In this exercise, you will interpolate camera translations and
rotations, program cubic interpolations, and shoot videos.
Discover the program
Download compile and run the program. It displays an image like shown
below. Using the keyboard, you can start/stop the camera animation, and
trigger image recording (the filenames are displayed on the standard
output). Note that for the keyboard event to be transmitted to the
application, the viewer must be in the appropriate mode (arrow instead
of hand).
The Coin3d implementation of SoOffscreenRender requires the setting of some environment variables.
After recording images, open a terminal in the directory where the images are saved, and type:
ffmpeg -i img%06d.jpg video.mp4
This should create a video that you can play with VLC. Try that.
The model is darker in the video than in the viewer, because the
renderer uses only the camera and the light sources below the
root of the scene, while the viewer adds its own light source to the
image rendered in the window.
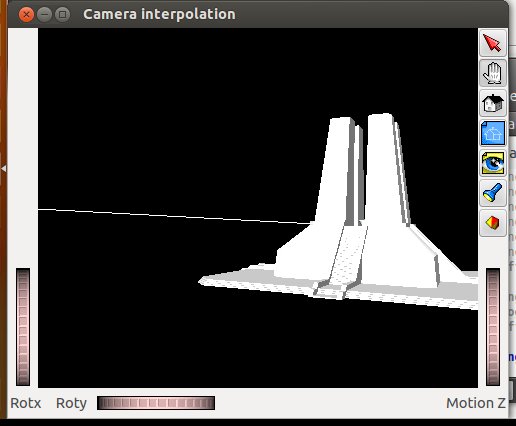
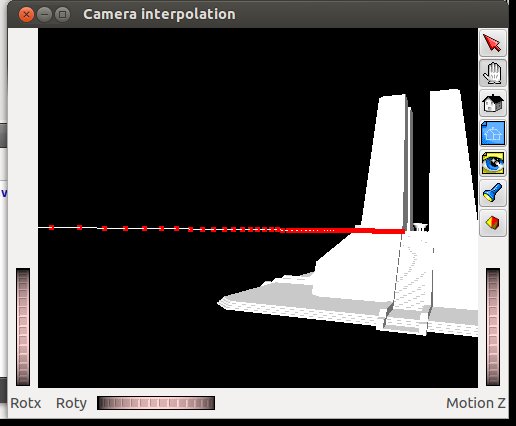
Viewing the trajectory
The trajectory is displayed using a white line, as shown in the left of
the following figure. Add red points, as shown in the right, to
visualize the successive locations of the camera during the animation.
This will held you setting up more complex trajectories.
For this, you need to add a SoPointSet , a SoMaterial and a SoDrawStyle node.
Trajectory displayed as a line.
Trajectory displayed as line + sampling points.
A piecewise linear trajectory
Set up an animation where the camer moves to the temple, climbs the stairs and stops in front of the vase.
Make an image of the trajectory.
Do a first version with a fixed camera direction, then one with the camera rotating according to the slope.
Shoot two videos of this: linear-translate.mp4 and linear-rotate.mp4
Smooth trajectories
Based on the given LinearSpline class, implement a cubic interpolation
class, and demonstrate it using an image of the trajectory (cubic.jpg)
and a video (cubic.mp4).